So, you want to animate something? You want to make moving pictures?
You have Clip Studio Paint, you know it can be used to make animations… but you have NO idea where to start!
YouTube! There’s plenty of videos available telling you how to animate.
Produced by people who have been doing this for years. Unfortunately, they assume you know things and regularly use terminology unfamiliar to you... and they go SO FAST! Even watching them at .25 speed, their speech is painfully slow, but the topics they cover still go by so quickly that you miss what they just clicked…
I understand your frustration. You wish there was a book that would take you through the basics, a step-by-step guide. Maybe you’re a Tactile Learner, so you need to print it out, turn pages, write notes, and highlight stuff. Well, maybe this site will help. I'll try to format it to print nicely, maybe one day when I'm happy with the content, I'll make a PDF you can download and print... someday... when I'm done?
Why am I doing this, and why am I doing it for free? Because I was where you are, I tried watching the videos and got lost and frustrated.
I struggled my way through the program, brute force, and learned the basics of animation and I want to share and inspire others.
I am not a professional animator, I am not even a professional artist. But I do have decades of experience with digital art and Graphic Design.
This is my goal:
Walk you through some basics and have you come out at the end with a simple animation and valuable experience.
As I said, I am not a professional, I am not making any claims that this is the definitive way to do things, I don't know everything.
I am not endorsed by CSP, CelCys or anybody, I am not being paid, I am not making commissions. This is just from me to you. Have fun.
I’ve already walk you through the basics of Clip Studio Paint in the Welcome and Tools pages.
So now I’ll get to the most BASIC basics of animating in Clip Studio Paint. I’ll only use 24 frames, so you can follow along in CSP Pro and get some valuable experience. Maybe you’ll become proficient enough that you’ll want to upgrade to CSP EX to be able to create longer animations.
Animation Terms:
Frame: One single image of a video. CSP Pro only allows 24 Frame animations. So the maximum number of images you can use is 24.
Cel: Throwback term from when animation was drawn by hand on Celluloid, a transparent film paper. It means the image being shown in that frame.
Start Clip Studio Paint
File->New
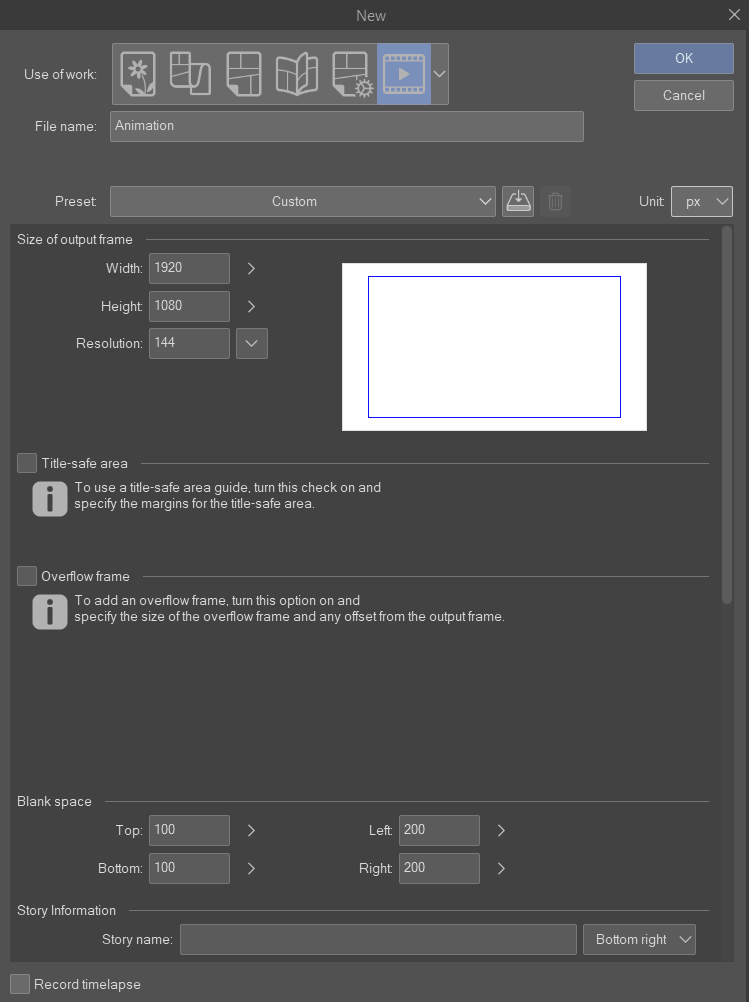
Select the Video Clip Icon at the Right of “Use of Work”
<- px This Unit box is saying you are looking at the scale as pixels per inch. Options are cm, mm, in, px and pt. {See The BASICS for more on Resolution}
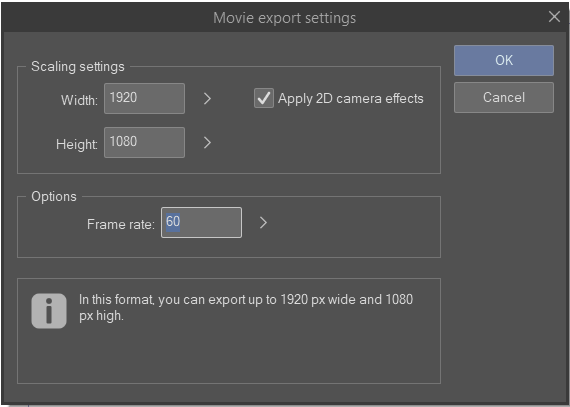
The standard Canvas size for a 1080p video is 1920 x 1080
I will use 1920x1080 @ 144 dpi for my animation(High Quality suitable for YouTube)
Recommended YouTube video dimensions:
240p (426 x 240), 360p (640 x 360),
480p (854 x 480), 720p (1280 x 720),
1080p (1920 x 1080)
Maximum YouTube video size: 3840 x 2160p
Minimum YouTube video size: 426 x 420p
The correct aspect ratio for YouTube: 16:9
Maximum file size for YouTube upload: 128GB
(Dragging this window wider or scrolling down gives you more optional settings to adjust… but for this intro project, the defaults will do.)
Hit [ OK ]
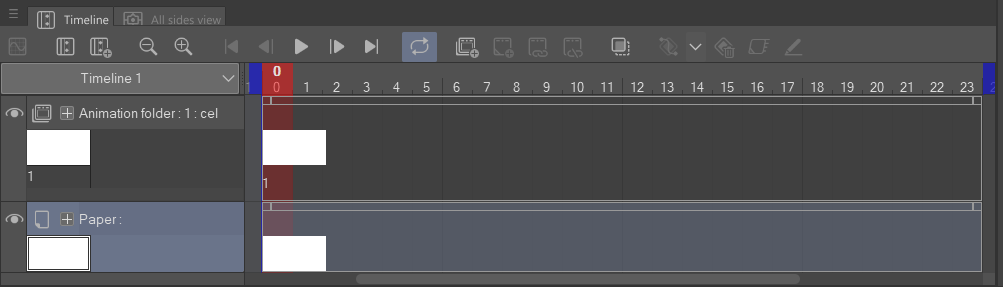
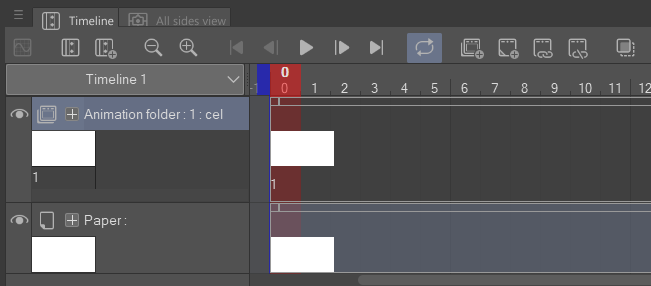
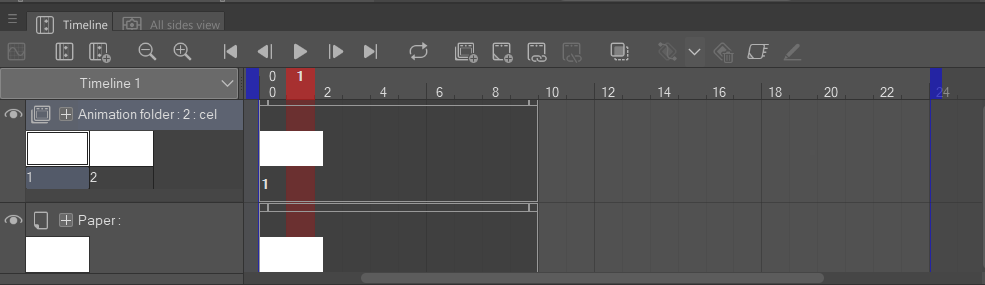
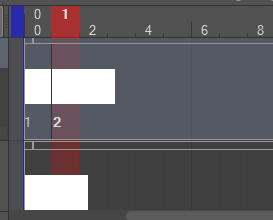
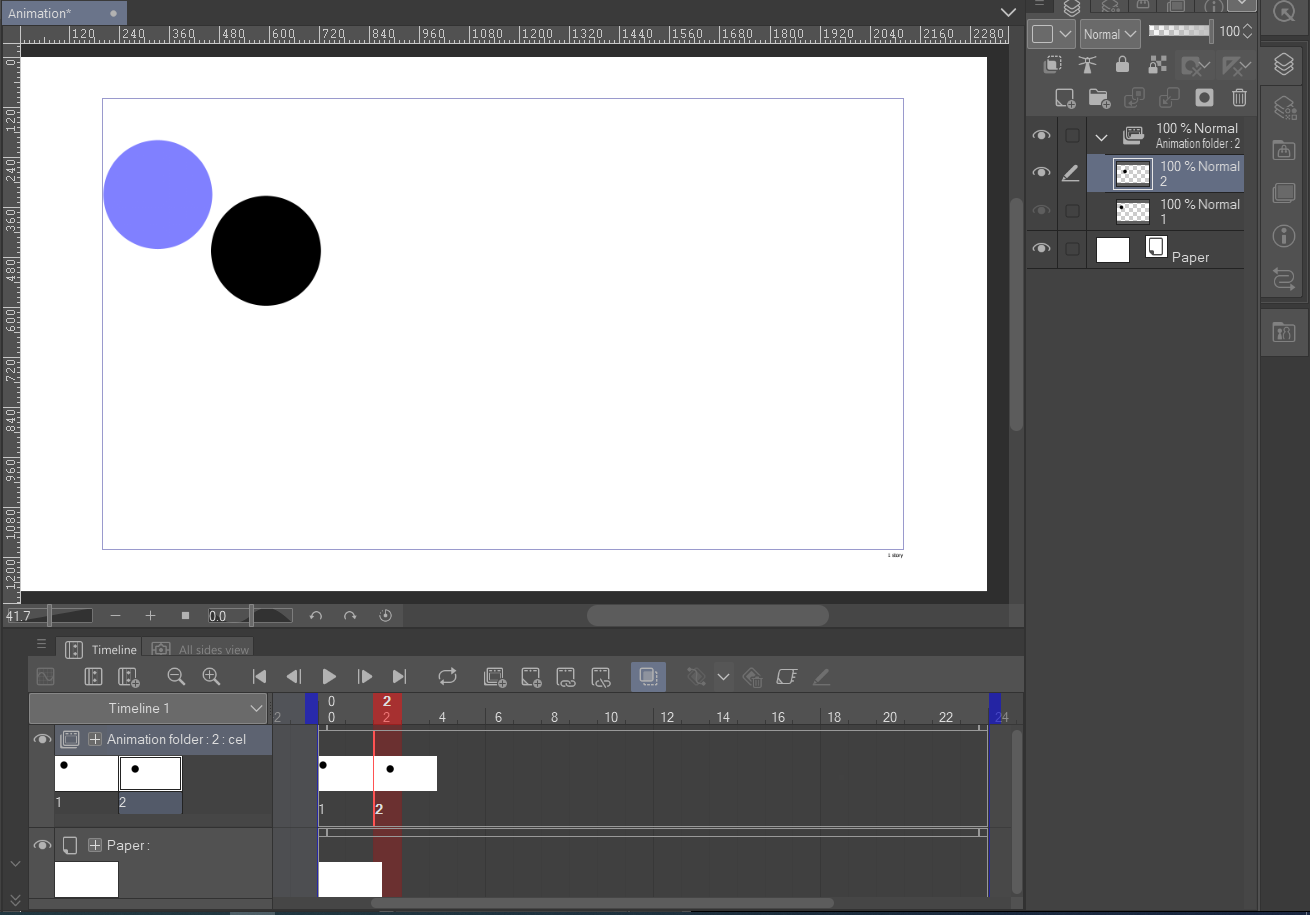
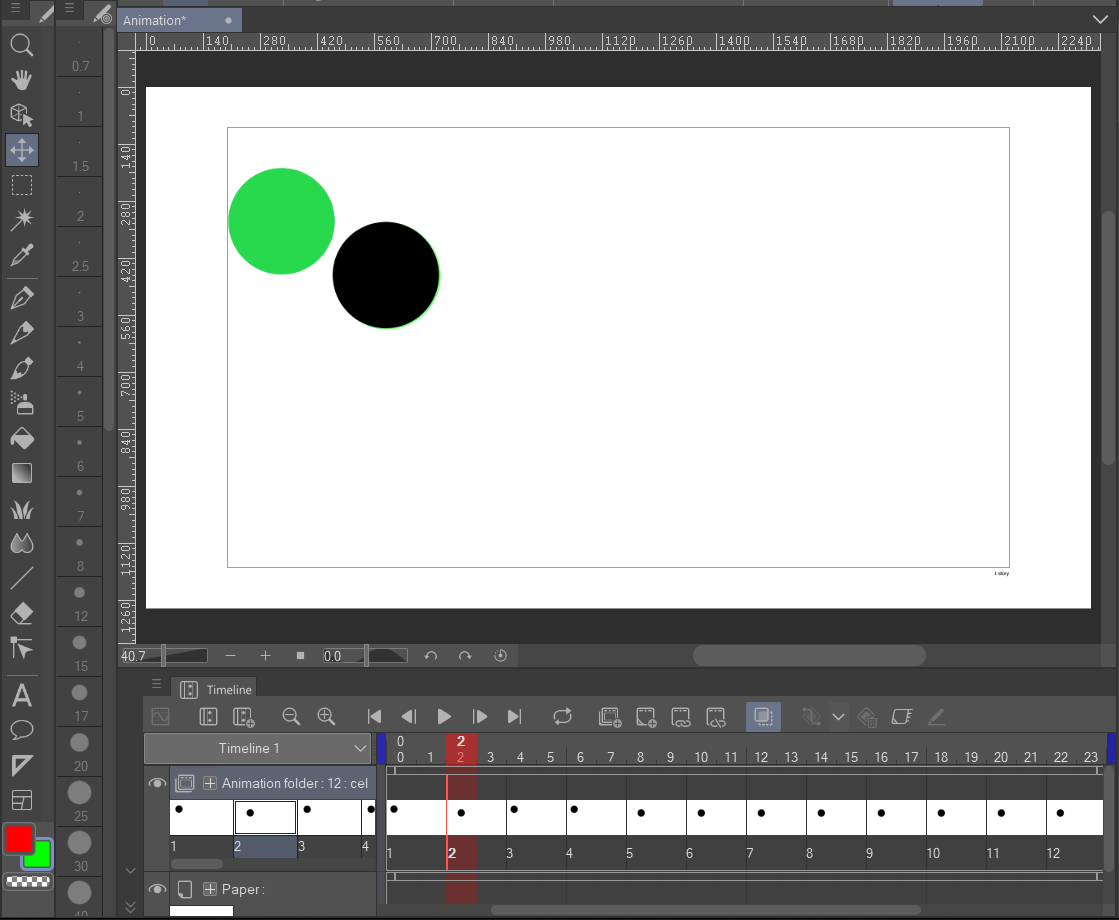
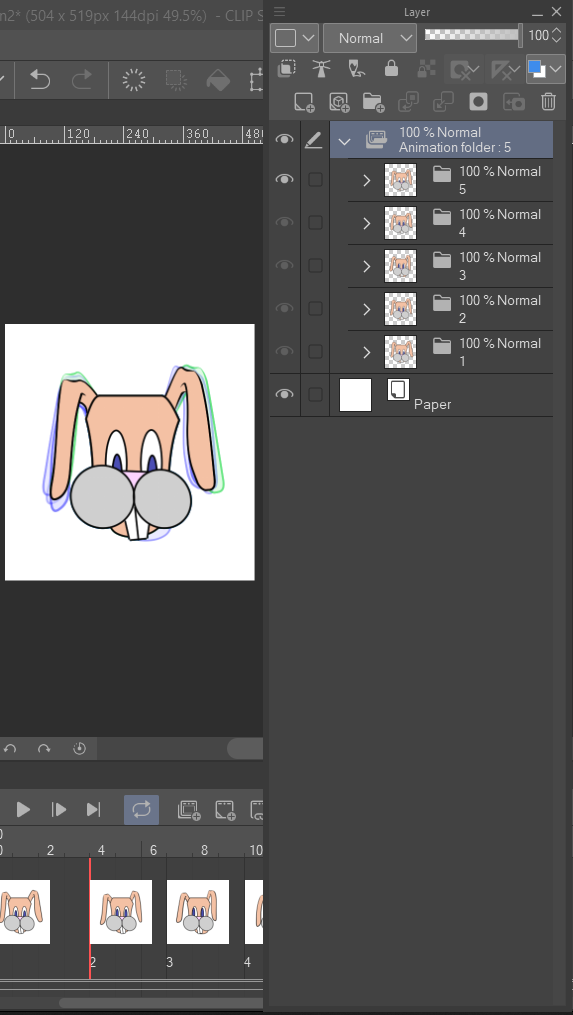
The "Blank Space" Setting is the White frame, this is outside of your actual output animation. The blue square is where the video will be trimmed on output. The white Frame area is “outside” space so you can continue your drawings into the region beyond the edges of your animation.
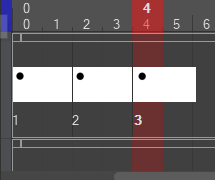
~Basically, anything you draw outside the blue box will be cut out of the final project.
The Animation Workspace
You will be using the TimeLine at the bottom to assign what layers are visible in each frame of your animation.
If it is not on your screen, look for a double arrow at the bottom pointing up, this means the TimeLine is Open, it’s just Hidden. Click the up arrows to unhide it.
If your TimeLine is not open (no arrows), go to Window->Timeline to show it.
On the Layers Panel, you will see an Animation Folder and Paper. Then down in the timeline, you will see a corresponding Animation Folder Cel and Paper.
The first thing to check is that you have your OnionSkin active.
An Onion Skin essentially shows you your images Before and After your Current Active image, so you can reference them for animation.
Go to Animation ->Show Animation Cels-> Enable Onion Skin.
* If you open the menus: Animation ->Show Animation Cels-> and there is a Checkmark beside ✔ Enable Onion Skin, then your Onion Skin is already active. Do not click it again, or you will deactivate it (Check the menu, look for the checkmark) You can also modify your Onion Skin Settings, to show more or less frames before and after (default is only 1 frame on either side) and the colorsused to show the reference frames.
The Default is Previous frames are Blue and Next frames are Green.
an Onion Skin view Showing 5 frames Before and 5 frames After the Active Frame (Black)
In your timeline menu, this is the OnionSkin button to quickly and easily turn the onionskin on and off.
The TimeLine
__ This is where the magic happens. The TimeLine.
The Red vertical bar is the point in the TimeLine of your animation that you are editing.
The Blue Bars/Bumpers at each end show the beginning and end of your animation.
The Animation Folder contains your layers of the frames you will show in sequence to make the animation.
The Paper is essentially your default background.
You can hover your mouse pointer/stylus tip over a menu item to see its name.
The Timeline Menu Buttons
[Zoom in to TimeLine] [Zoom Out of TimeLine]
[Go to Start] [Previous Frame ] [Play] [Next Frame] [Go to End] [Loop play]
[New animation Folder] [New Animation Cel] [Specify Cel] [Delete Specified Cels]
[Onion Skin] [Keyframe tools]
(I won't be using KeyFrames for this Intro to Animation)
Quick Note on the TimeLine
The Blue bars in the TimeLine are the beginning and end bumpers of your animation.
The light gray area between the blue bumpers is your TimeLine, the numbers at the top are your Frame numbers.
Right now, in the image below, the Paper layer is visible from Frames 1-24, but the Cel-1 layer is only visible from Frames 0-10, the dark grey box shows duration of the visibility.
If I pushed play right now, everything contained in Animation folder 1 disappear at frame 10, so I will need to drag the Paper active box to the end of the TimeLine to utilize the contents of Animation folder 1 for the whoe animation.
Grab the little box in the top right corner (Red arrow) of the Duration Box and drag it to make the Paper and Animation folders visible for the full 24 Frames (Green arrow)
Starting Simple
We’ll only be working in ONE Animation Folder, Using a single Cel for each Frame. Each Cel will be drawn on one layer.
To begin, in your Layers panel, you have 1 Animation folder which contains 1 Layer and the Paper.
In your Timeline bar click New Animation Cel or in your Layer Panel click New Layer.
This will add another Raster Layer to your Animation folder.
The Visibility eye on Layer 2 is grey =====>
because only 1 Cel can be visible at a time.*
Right now, only Cel-1 (layer 1) is visible.
You can see Layers 1 and 2 in the Animation folder in the TimeLine.
The 1 by the Red Bar in the TimeLine indicates that Layer 1/Cel-1 is the Cel being shown.
The * is because there are ways around this limitation of only one layer being visible at a time, but for this simple introduction, I don't want to introduce that yet.
It will come later, let's get this one done first. =)
Next we'll Specify when to show Cel-2.
Specify Cels
In your TimeLine, Click the second Frame to put the red bar there,
then click the Specify Cells button
You'll get this PopUp to Select the Layer
your want to Specify to be visible in the
selected Frames.
This will list all of your layers by their Layer Name
so it's important to properly identify Layers.
Right now, we just have 1 & 2. Select 2, [ Ok ]
You can either click the layer in the list or
type its name into the text box at the bottom.
Now you have Specified Layer 2 to be visible as Cel-2.
Cel-2 is selected (indicated by the location of the red bar),
so now the Visibility eye of Layer 1 will be greyed out. ===>
Cel-1 will be visible for 1 frame, Cel-2 will be visible for the next 23
You can select Frame 1, click and drag to move the placement of Cel-2.
If you want Cel-1 to be visible longer, say 2 frames, drag the start bar of Cel-2 to the right one frame.
Cel-1 will now be visible for 2 frames and Cel-2 will be visible for the next 22.
You can adjust the timing of your animation transitions by dragging these positions to make the Cel show for a longer or shorter time.
~~But... I HAVEN’T DRAWN ANYTHING YET!!! Nope, sorry. Animation requires some setup.
Now, let’s Draw!
I’m just going to do a simple bouncing ball animation for this introduction to animation.
My Plan: (always plan out your animations. Animating is a lot of work, you want to get it right the first time, or as close as possible.)
A simple ball that bounces back and forth infinitely from left to right, impacting the floor in the center and the wall on each side.
Animation will be 24 Frames long.
Frame 1: Ball touches top left corner, Frame 6: Ball touches floor, Frame 12: Ball touches top right corner.
Then I’ll use the same 12 Cels, making them visible in reverse order for Frames 13-24 to return the ball to the left.
Then when the animation plays in an infinite loop, it will seem to go back and forth forever.
In the TimeLine toolbar, select Cel-1 (Frames 1 and 2). Cel-1 becomes the Active Layer in the Layers panel and we can now draw on it.
Draw a circle in the top left corner of the canvas on Layer 1
Next,
In the TimeLine toolbar, select Cel-2 (Frames 3 to 24). Cel-2 becomes the Active Layer in the Layers panel and we can now draw on it.
If your Onion Skin is active,
then you should see Cel-1 as a blue ghost.
If you don't see it, click the OnionSkin button in the Timeline
Since we're just doing a simple bouncing ball animation,
I'm going to fast-track the art and just duplicate the ball layer 12 times.
Name the Layers 1-12
Only Cels 1 & 2 are defined, even with 12 Layers in the Animation folder now.
So, lets use what we've learned so far to assign the rest of these layers.
Click 1: Select where you want to assign the Cel
Click 2: Specify Cel
Gives you the popup window to choose the layer to assign
Click 3: Select the layer to assign it to display in the Cel
Click 4: [ Ok ] Commit!
All 12 Cels are Secified.
The images are in 2 positions (depending on how you duplicated the layers), so if you hit Play right now, you'll see the ball in two positions.
Not exciting... yet.
To move things, click in the TimeLine on the Cel you want to adjust.
Clicking on Cel-2 will activate Layer 2 and you can drag it to a new position.
Here's a video of adjusting
the Cels and other explanations
of the process.
Let's Export!!
You can Export your animation in several different formats:
Image Sequence: Each frame is saved as an Image that
can then all be compiled from the indicidual Frames
into an animation in another program.
Animated GIF: For use on websites.
Animated Sticker: For use in chat/text apps
Movie: Can be uploaded to YouTube (.mp4)
Animated GIF
Height/Width, the size of the image
Export Range: Frames ? - ?
If you only want to output part of the animation.
Frame Rate: 60 fps is standard,
30 fps will make my short animation twice as fast
(runs through the 24 frames faster).
99 fps (max fps) will make it twice as slow.
Movie File .mp4
Output using these settings
* Super Secret time!
Ok, so in the course above, I said "only 1 Cel can be visible at a time.* "
By using these folders and layers you can make multiple
elements that can be individually moved, distorted, redrawn
or manipulated in some way to create change.
<== Here are the 5 layers I used to aniumate the bunny above.
But if I open Layer 1 ==>
( Folder 1/ Cel-1)...
Then you can see all of
the pieces I made the
bunny up with.
"Pieces" of the character
in different folders lets
me shift them without
having to redraw
everything.
Essentailly making him a
bit like a puppet.
I can move, Distort or
redraw things on their
layer without interfering
with the other parts.
This method of pupperty in animation works for things like SouthPark, even Archer or SeaLab 2021
where the characters are made up of "simple" shapes and pieces that are moved around rather than
the whole scene being redrawn by hand for each Frame. Just copy the folder and modify the pieces.
This is only ONE way to animate. There are other ways to go about making moving pictures.
There are also KeyFrames, and Tweening that I haven't covered here.
If you are capable and comfortable with this above lesson, and have gone on to use layers
and such in your animations, then I highly recommend you do more research on animating,
find a book, watch videos on YouTube. This was the Basic introduction to Animating in
Clip Studio Paint. From here it's up to you to pursue the depths of animation.
Good Luck!
Well, it's true that only 1 layer can be visible in the Cel, but what I didn't tell
you above was that your Cel can be a folder, containing folders, Layers
(Vector, raster, adjustment layers) and all of these will be visible as one Cel
If you found this site helpful, promote it! Tell a friend!
If you post your animations on YouTube, mention this site!
But most important: HAVE FUN!
created with
Website Builder Software .